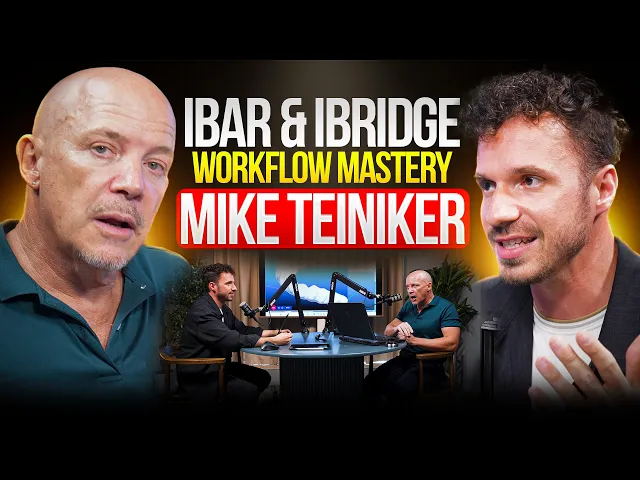
Learn smarter. Practice bolder.

Advanced iBAR & iBridge Masterclass with Mike Teiniker
Master advanced digital workflows for implant bars, bridges, and full-arch esthetic restorations.
Introduction by Mike Teiniker

Advanced iBar on Implants (Hybrid Case)
We start with an implant-supported hybrid featuring a distal extension. You’ll learn to place and batch-edit tubes, generate cones, draw a clean basic design, build and refine the cutter, then add safety material and separate the bar for a robust result.

Advanced iBar on Implants (Hybrid Case)
We start with an implant-supported hybrid featuring a distal extension. You’ll learn to place and batch-edit tubes, generate cones, draw a clean basic design, build and refine the cutter, then add safety material and separate the bar for a robust result.
Make Tubes & Cones
03:08
Place tubes from top view, batch-edit all tubes at once, and generate cones; learn vertex placement and quick fixes if a cone doesn’t cover correctly.
Make Tubes & Cones
03:08
Place tubes from top view, batch-edit all tubes at once, and generate cones; learn vertex placement and quick fixes if a cone doesn’t cover correctly.
Draw the Basic Design
08:33
Lay down a smooth, shallow path; avoid 90° corners, watch bar thickness, and use quick measuring to confirm minimums.
Draw the Basic Design
08:33
Lay down a smooth, shallow path; avoid 90° corners, watch bar thickness, and use quick measuring to confirm minimums.
Create & Edit the Cutter
13:39
Extrude from the correct view, remesh to a solid cutter, and begin targeted edits (push/pull, heat map checks).
Create & Edit the Cutter
13:39
Extrude from the correct view, remesh to a solid cutter, and begin targeted edits (push/pull, heat map checks).
Safety Zone & Separate
23:16
Add safety material (thickness math made simple), adjust around screw heads, accept thickness, and separate cleanly for a finished metal structure.
Safety Zone & Separate
23:16
Add safety material (thickness math made simple), adjust around screw heads, accept thickness, and separate cleanly for a finished metal structure.

iBridge on Tooth Preps (High Bridge)
On a high-bridge with prepped teeth, we patch thin zones, then follow the same iBar logic: tubes & cones from tooth margins, basic design, cutter creation, blockout verification, safety material, and separation with precise cement space.

iBridge on Tooth Preps (High Bridge)
On a high-bridge with prepped teeth, we patch thin zones, then follow the same iBar logic: tubes & cones from tooth margins, basic design, cutter creation, blockout verification, safety material, and separation with precise cement space.
Make Tubes & Cones (Tooth Preps)
36:19
Select edge loops or outline manually; create tubes and coping-like cones with thickness appropriate to your equipment.
Make Tubes & Cones (Tooth Preps)
36:19
Select edge loops or outline manually; create tubes and coping-like cones with thickness appropriate to your equipment.
Draw the Basic Design
41:26
Keep the path shallow and outside where needed to preserve thickness through the span.
Draw the Basic Design
41:26
Keep the path shallow and outside where needed to preserve thickness through the span.
Create & Edit the Cutter
44:45
Extrude/cut, angle as needed, relax if the mesh collides, then edit with proportional controls; use “Refresh Cutter” after bigger edits.
Create & Edit the Cutter
44:45
Extrude/cut, angle as needed, relax if the mesh collides, then edit with proportional controls; use “Refresh Cutter” after bigger edits.
Blockout
52:00
Run a quick survey, detect undercuts in transparent mode, create the passive model — a fast step that protects fit.
Blockout
52:00
Run a quick survey, detect undercuts in transparent mode, create the passive model — a fast step that protects fit.
Safety Zone & Separate
54:29
Add/adjust safety zone, accept thickness, set staged cement space (e.g., 50 µm + additional layer), and separate for milling-friendly geometry.
Safety Zone & Separate
54:29
Add/adjust safety zone, accept thickness, set staged cement space (e.g., 50 µm + additional layer), and separate for milling-friendly geometry.

iBridge with Esthetic Zone
We repeat the iBridge flow, then switch to Additional Tools to carve an esthetic facial window. You’ll edit the cutter, verify thickness/undercuts, and finally separate the hybrid for a metal-lingual + zirconia-facial solution.

iBridge with Esthetic Zone
We repeat the iBridge flow, then switch to Additional Tools to carve an esthetic facial window. You’ll edit the cutter, verify thickness/undercuts, and finally separate the hybrid for a metal-lingual + zirconia-facial solution.
Make Tubes & Cones (Tooth Preps)
1:00:24
Loop-select margins (or outline), generate cones at your chosen minimal thickness for a predictable internal space.
Make Tubes & Cones (Tooth Preps)
1:00:24
Loop-select margins (or outline), generate cones at your chosen minimal thickness for a predictable internal space.
Draw the Basic Design
1:03:05
Lay a clean, continuous path; keep curves gentle and avoid inside intrusions that thin the bar.
Draw the Basic Design
1:03:05
Lay a clean, continuous path; keep curves gentle and avoid inside intrusions that thin the bar.
Create & Model the Cutter
1:05:16
Extrude/cut/angle, remesh, then edit and “Refresh Cutter” as you correct areas; perform quick fit checks (blockout/heat map) and accept thickness.
Create & Model the Cutter
1:05:16
Extrude/cut/angle, remesh, then edit and “Refresh Cutter” as you correct areas; perform quick fit checks (blockout/heat map) and accept thickness.
Additional Tools (Esthetic Window)
1:18:11
Select and remove the facial portion, extrude the cutter inward to define the zirconia overlay zone, keeping perimeters smooth and milling-friendly.
Additional Tools (Esthetic Window)
1:18:11
Select and remove the facial portion, extrude the cutter inward to define the zirconia overlay zone, keeping perimeters smooth and milling-friendly.
Separate
1:21:12
Return to separation to finalize the hybrid: metal on the lingual, zirconia on the facial — ready for export and fabrication.
Separate
1:21:12
Return to separation to finalize the hybrid: metal on the lingual, zirconia on the facial — ready for export and fabrication.
The Teacher
Hi, I'm Michael
The Teacher
Hi, I'm Michael
Co-Founder of Blender
for
Dental and Creator of iBAR
Creator of iBar and many of B4D modules digital technicians use every day. Mike brings the “inside the software” view, showing you why each module works the way it does, not only how to click through it.


course info
What to expect
course info
What to expect
course info
What to expect
Skill Level
Intermediete
Time to Complete
1.5 Hours
Certification
After Completion
Prerequisites
iBar Basics
about
Is this course right for you?
about
Is this course right for you?
about
Is this course right for you?
This advanced DACademy course immerses you in the full power of iBAR and iBridge for complex implant and full-arch workflows.
You’ll learn how to:
Reinforce thin hybrid structures
Design smooth, durable bars
Prevent undercuts
Integrate esthetic zirconia overlays seamlessly
Led by Mike Teiniker and Antonello Croce, the course mirrors real-world cases — from framework creation to final export — with tips that improve both strength and esthetics.
skills
Skills you'll walk away with
skills
Skills you'll walk away with
skills
Skills you'll walk away with
Advanced iBAR hybrid design techniques
Efficient tube & cone generation for implants and preps
Safety-zone and dual cement-space strategies
Mesh editing & heat-map inspection for strength control
Full-arch esthetic integration with zirconia overlay
What You'll Learn
Master every step of the iBAR and iBridge workflow — directly from the creator.
What You'll Learn
Master every step of the iBAR and iBridge workflow — directly from the creator.
What You'll Learn
Master every step of the iBAR and iBridge workflow — directly from the creator.
Lesson 1
Design and strengthen advanced implant bars with precision.
Lesson 1
Design and strengthen advanced implant bars with precision.
Lesson 1
Design and strengthen advanced implant bars with precision.
Lesson 2
Reinforce bridge structures and prevent fit issues using block-out modules.
Lesson 2
Reinforce bridge structures and prevent fit issues using block-out modules.
Lesson 2
Reinforce bridge structures and prevent fit issues using block-out modules.
Lesson 3
Add esthetic zirconia layers for functional and visual excellence.
Lesson 3
Add esthetic zirconia layers for functional and visual excellence.
Lesson 3
Add esthetic zirconia layers for functional and visual excellence.
faq
Frequently Asked Questions
faq
Frequently Asked Questions
faq
Frequently Asked Questions
What is the DACademy Core Video?
Do I need prior experience?
Is this course required before others?
Will I get a certificate?
Which software is used?
Can I revisit the course?
What is the DACademy Core Video?
Do I need prior experience?
Is this course required before others?
Will I get a certificate?
Which software is used?
Can I revisit the course?
What is the DACademy Core Video?
Do I need prior experience?
Is this course required before others?
Will I get a certificate?
Which software is used?
Can I revisit the course?
